5 minutes is all it takes
From install to your first AI chat, get started in four steps.
- 1
Install and run
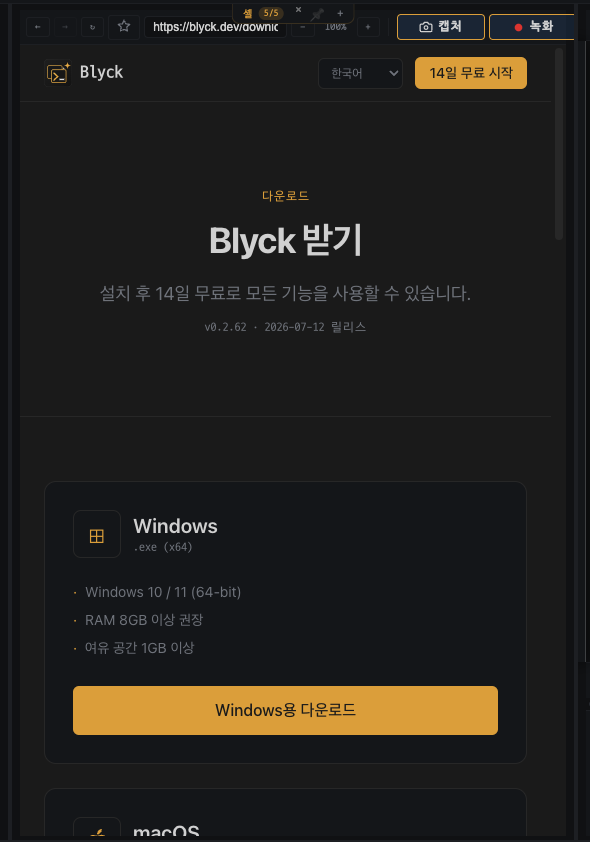
Download the Windows .exe or macOS .dmg and install it. If you see an OS publisher warning on first launch, allow it once following the "First-run guidance" on the download page.
- · Download → install → run
- · Unsigned warning is normal — More info → Run anyway
- 2
AI setup wizard
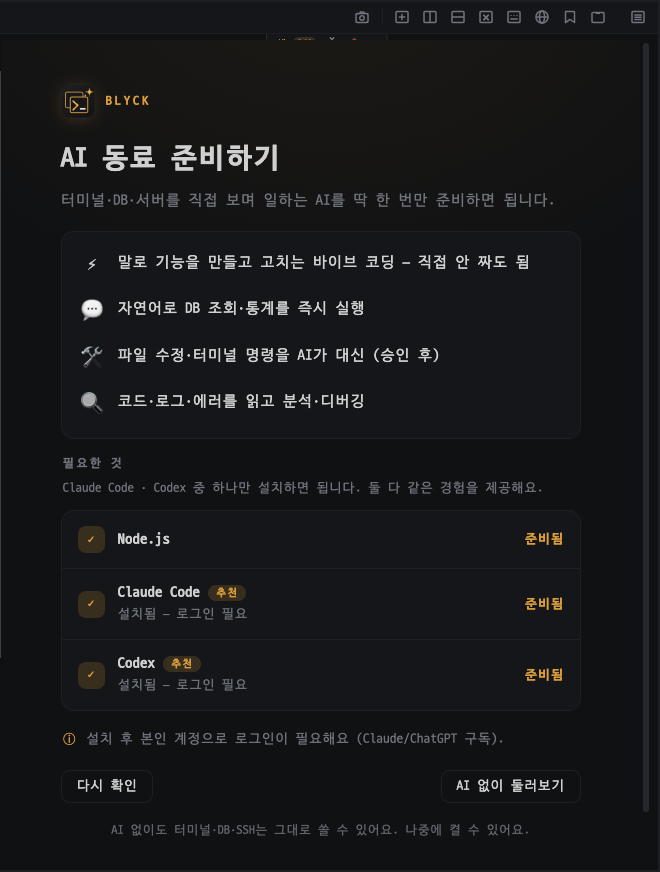
On first launch, the AI setup wizard guides you. Signing in with your Claude or Codex subscription plan (no API key needed) activates inline AI, chat, and agent features. (Local RAG embedding works even without signing in.)
- · Choose Claude / Codex and sign in with your plan (no API key)
- · RAG embedding is prepared locally and automatically
- 3
First SSH connection
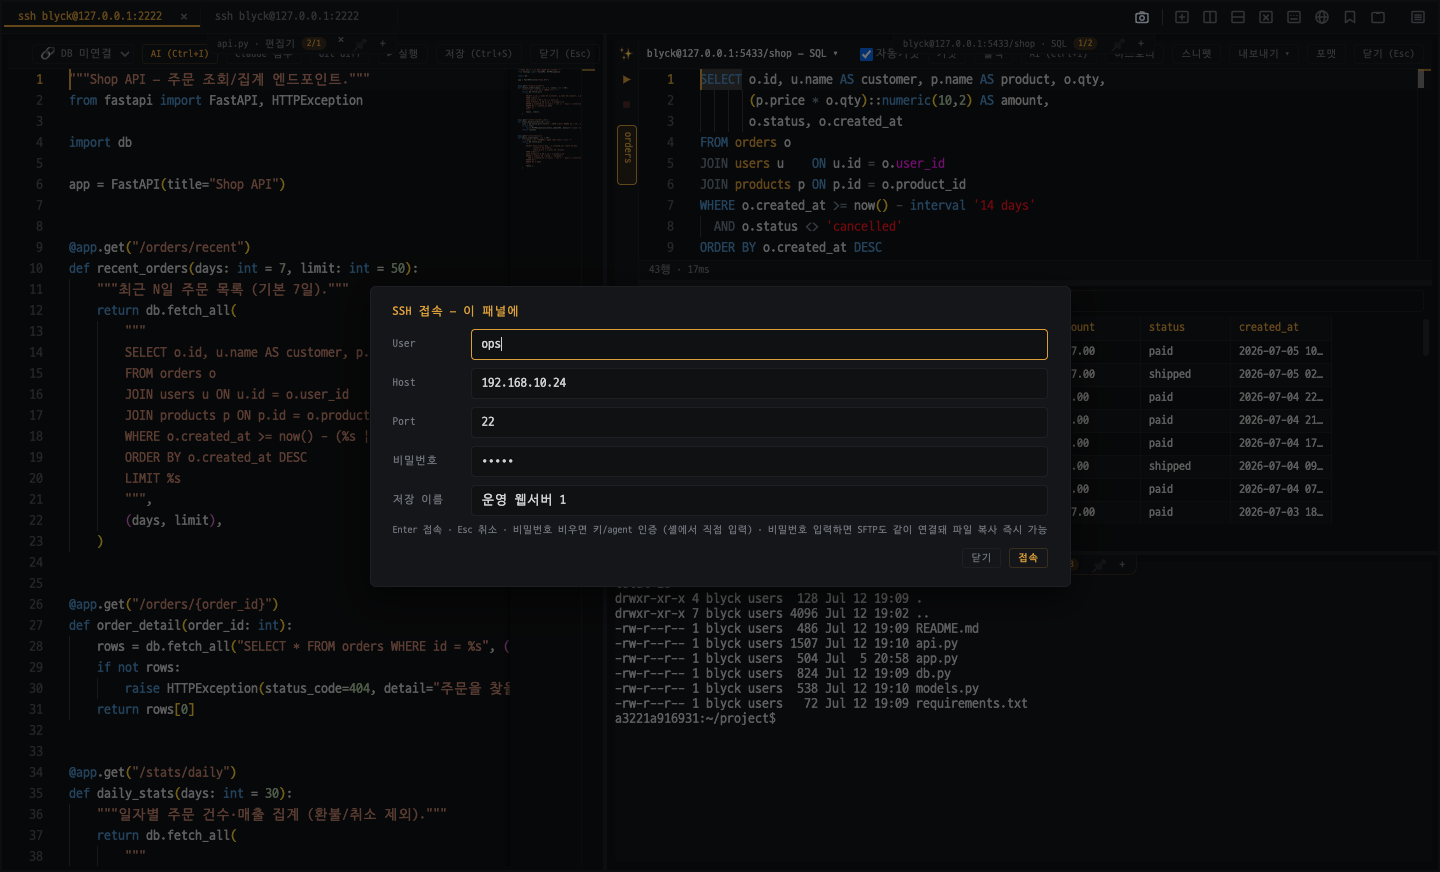
Select SSH in a new panel and enter the host and account to connect right away. Save servers you use often as connection profiles to connect in one step next time.
- · Enter host · port · account → connect
- · Save the connection; auto-reconnect if dropped
- · No broken output for non-ASCII text
- 4
First AI chat
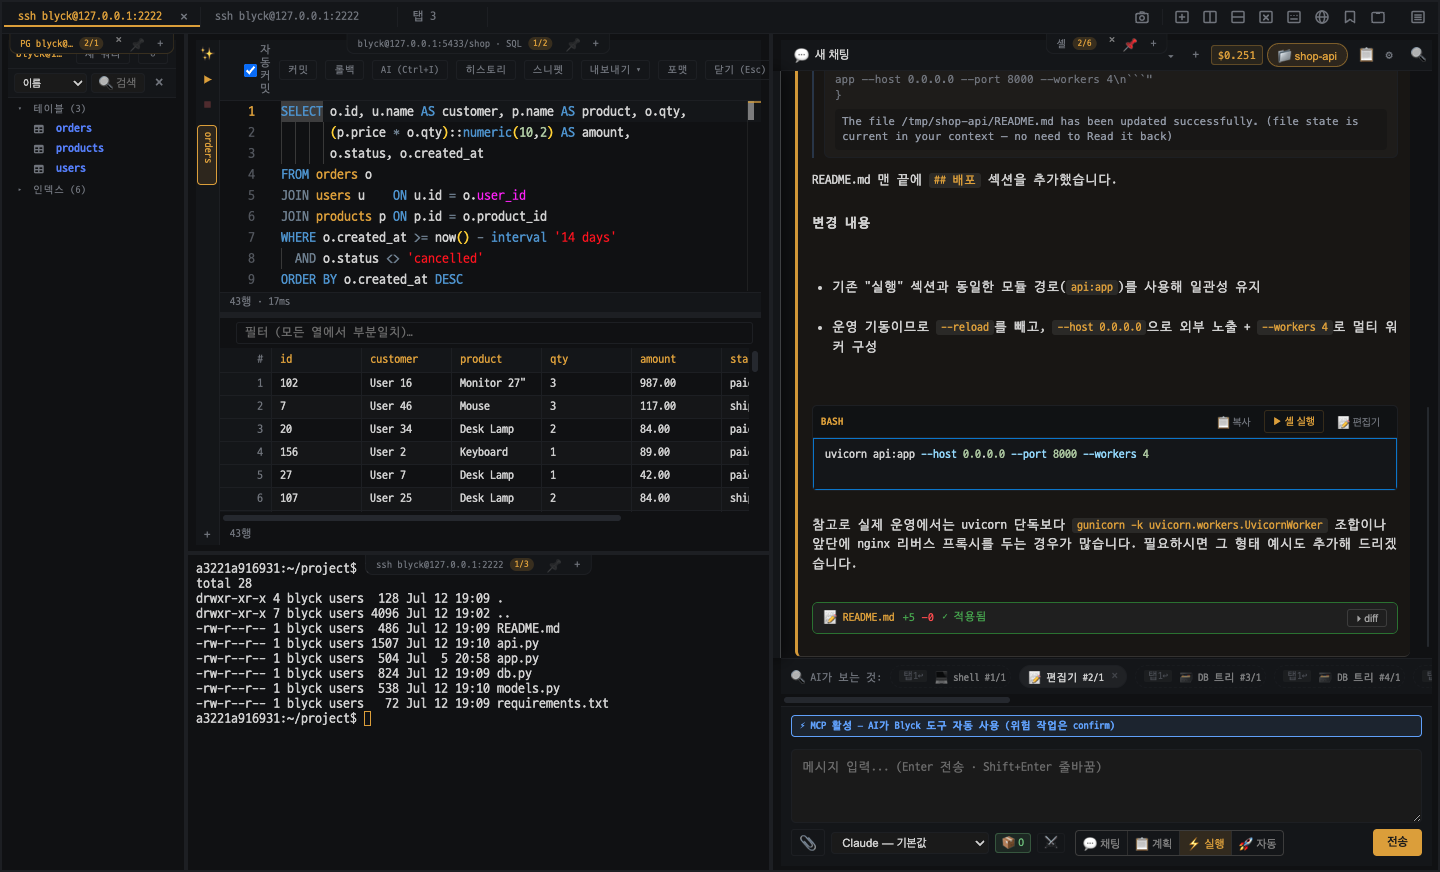
Open the AI chat panel and ask in natural language. Blyck is aware of your current workspace (editor · DB · SSH · files) and, when needed, runs commands directly to answer with results.
- · "Show me this SSH server’s disk usage"
- · "Tell me yesterday’s sign-ups in the prod DB"
- · Delegate multi-step tasks in agent mode
Go deeper
Find detailed usage per feature in the docs, and reach out for anything you get stuck on.